Cuddy Composting Toilet
The Cuddy Composting Toilet is a completely self-contained composting toilet and is ideal for full-time off-grid living or extended travel. The Cuddy provides a low-maintenance, easy-to-use solution for those who are looking for a more sustainable and eco-friendly way to manage their waste.
Key Product Highlights
-
Self-Contained System: No need to add a layer of substrate after every use, freeing up room in your tiny space. Conserve space in the solids bin by discarding toilet paper in a separate trash can.
-
Odorless: Innovative urine-diverting design separates urine from solids, preventing mixing and creating sewage, keeping your bathroom smelling fresh.
-
Reduced Emptying: Better waste breakdown through efficient composting means fewer trips to the compost pile to empty.
-
Agitator Mechanism Condenses Waste: Ensures simple and effective waste management by mixing and drying waste, making composting faster and easier.
Delivery:
Cuddy is designed, molded, and assembled in California, and will be shipped free of charge with tracking directly to your door, duty free, in the Continental USA and Canada.
Returns:
No problem if you change your mind! We make returns super easy by covering the cost and offering a full refund if you're unhappy for any reason within 30 days of receiving Cuddy, as long as you haven't used it and return it in the original packaging.
- D x W x H: 17.0" x 15.2" x 16.3"
- Weight: 28 lbs
- 3.9 Gallon Solids Bin
- 1.7 Gallon Liquids Bottle
Power Requirements:
- 12V - Fan (Power Cord Included)
- 9V Battery (Not Included) - Smart Urine Level Indicator
- Cuddy Composting Toilet
- Solids Bin with Agitator & Cover
- Urine Bottle with Silicone Valve
- 12V Fan with Reusable Carbon Filter
- Rehydration Bag
- Urine Bottle Cap
- Vent Plug
- Fly Screen
- 12V Power Cord with DC jack - to be wired into your power source
- Googly Eye Stickers

Perfect for Long Trips & Full-Time Off-Grid Living
The Cuddy Composting Toilet is designed for those who spend extended time off the grid, offering a high-performance, self-contained toilet solution that reduces the frequency of emptying.
With advanced features like a built-in agitator, fan, and air filter system, it makes waste management simple and effective. Cuddy separates liquids from solids to minimize odors, dries out waste to reduce volume, doesn't need water to function, and reduces storage space required, making it an ideal choice for long-term use.

HOW TO SET UP YOUR CUDDY
Viewing


Viewing


Best For
Full-time off-grid living
Lightweight, temporary setups
Plug-and-play, no composting
Composting
Yes (with agitator)
Yes (bag-based)
No (bag-sealing + disposal)
Power Needed
12V fan + 9V Battery - LED urine level indicator
9V Battery - LED urine level indicator
Rechargeable Li-battery
Odor Control
Excellent (carbon filter & fan + liquids diverted)
Very good (liquid diversion, no fan)
Excellent (sealed bag, liquids diverted)
Urine Diversion
✔
✔
✔
Emptying Frequency
Solids: 2–3 weeks
Liquids: 2–3 days
Solids: 1–2 weeks
Liquids: 2–3 days
~50 flushes per cartridge, bags disposed as needed
Venting Option
Yes
Yes
Yes
Frequently Asked Questions
-
Anywhere you like!
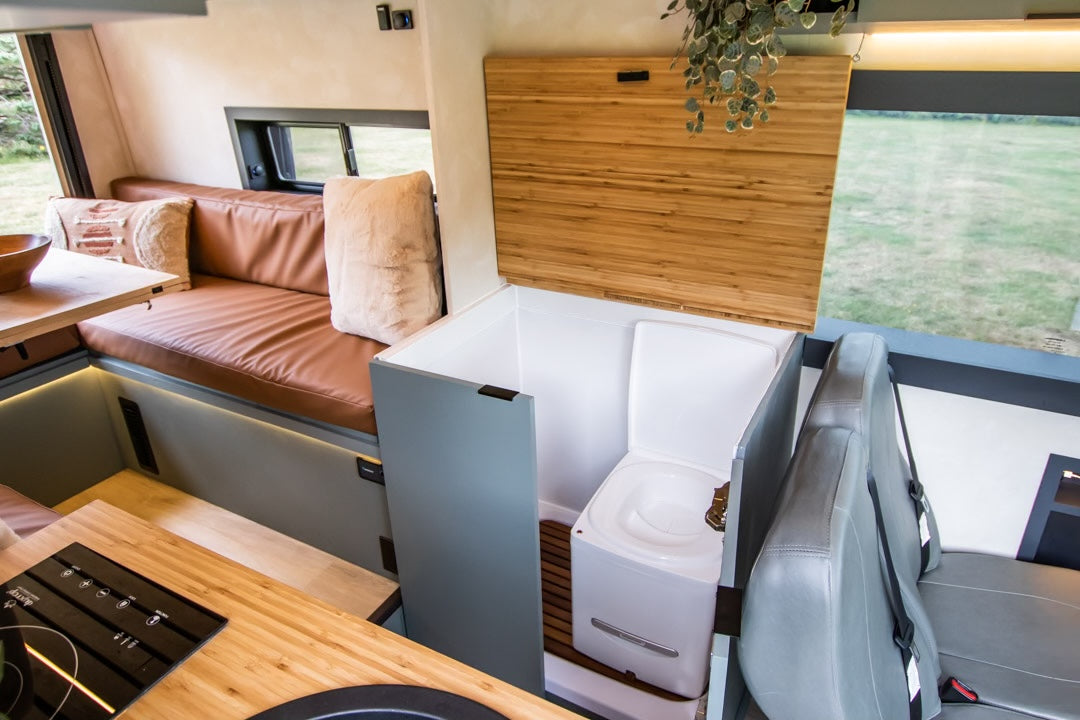
Cuddy is perfect for vans, campervans, RVs, Tiny Homes, off-grid cabins, boats and more.
It size, shape and portability make it suitable for anywhere you need to poop.
Check out some example use cases here: Solutions
-
Cuddy takes 12v, and we ship with the parts to be hard-wired via a 5.5 x 2.1mm plug, or you can plug it into the mains with an adapter.
If you want to move Cuddy around that's easy too. You can get a cig plug, or merit plug adaptor or even a USB to 12V cable with a 5.5 x 2.1mm plug. Cuddy will go anywhere. Cuddy is very efficient - draws about 0.3 amps.
It is ok if Cuddy is not connected to power all the time.
If you store Cuddy in one place while travelling it could go without power and use it where there is power, or vice versa.For the "pee full" indicator Cuddy uses a 9v battery, you will need to supply that.
-
No, composting toilets do not smell when used properly. They will not stink out your van, boat, tiny home, camper, or cabin.
The composted material looks and smells earthy—like a forest floor. When emptying the toilet, there is no unpleasant odour, unless you’re one of those rare folks that don’t like forest floors.
-
There are obviously a whole range of variables and factors that we can’t account for in this general advice – please write to us at: info@compocloset.com, we are happy to discuss what option might work best for you.
We also appreciate that no matter what general advice we give, users will have their own preferences due to their unique circumstances. Those opinions are as valid as ours.
Remember: Both Cuddy and Cuddy Lite separate
solids and liquids, that is the most important thing. If you’re considering a travel toilet that does not separate, you will either have to use chemicals and a dump point, or you will be putting raw sewage into a bin or into the environment, please don’t do that.Our general advice is as follows:
Full time use: Cuddy - You will have to empty less often, it will generally be more “pleasant”, and no need for plastic bags.
Regular use: Cuddy - After each trip you don’t have to worry about emptying the solids bin and the composting process will just continue. We have gone for 6 months between emptying our solids bin.
Irregular use: Could go either way, a Cuddy for the reasons outlined above, or a Cuddy Lite if you don’t want to or are unable to continue composting between trips.
Once in a blue moon: Cuddy Lite – Likely you will want to get all your kit cleaned and put away for next time.
Away with a group of
people all using your loo: Cuddy Lite – With heavy use over a short period very little composting will begin, and from our first-hand experience you will end up with a bin full of very fresh deposits that won’t be pleasant to empty.If you can’t make a
decision, we suggest you go for the Cuddy.If you have A Cuddy and an additional solids bin without an agitator, you will have a Cuddy and a Cuddy Lite in one unit. It is the most versatile, fully optioned, and most affordable travel toilet in the world. It can adapt to any install, or portable application you can throw at it.
You can turn a Cuddy into a Cuddy Lite, but you can’t turn a Cuddy Lite into a Cuddy.


